Monday, January 26, 2009

Project 5: Fix the upstairs bath

The second full bath is located upstairs between the second and third bedrooms. The bathroom shared a door with the second bedroom, but the door and the frame of the door were recently torn out of the wall:


Besides the ugly cabinets, sinks, faucets, mirrors, and light fixtures...wait, is there actually anything good about this bathroom?

The tub is decent, and is draining better than it used to, although we would prefer that it wasn't so slow. The toilet isn't in as good of shape as the downstairs toilets. However, the floor of this bathroom was tiled with the same tile as in the master bath and half-bath. A tile near the toilet is loose, and the materials needed to repair it were found underneath the second sink. It appears that McVicker thought about fixing this problem, but then laziness overtook his good impulse. Also, this room isn't currently painted any real color, which will make painting it easier, and I appreciate the fact that the wallpaper I suspect used to mar this room is now gone and we didn't have to do the work ourselves.

Once the wall where the door was is filled in, N and I are thinking of adding bead board to hide most of the wall, as well as replacing the baseboard in this room and the bedroom, since new baseboard will be needed to go along where the door was previously.

We have bought the color of paint for this room: Valspar's Temptation in flat enamel. The ceiling in this room was repainted a true white (as noted in the description of Project 4). Financially we have to postpone any further renovations until later in the year. We have replacement light fixtures that my mom gave us, and will consider what type of mirrors and vanities we would like to install in the future. We still have 90% of our fence to replace, as well as new carpet sometime this year, and those are priorities.

The upstairs bathroom, picture from the real estate brochure:


The sinks are the same as what was in the half-bath downstairs. This bathroom features a cultured marble counter/sinks, and faucets that one can still buy at Lowe's for $14.99. Both of the sinks have a slow drip that is causing a calcium/iron/whatever build up on the hardware. Anyway, here's one of the nasty-looking sinks:


The broken tile:


Whenever we can replace the vanity in this bathroom I would like to, if only to make accessing the toilet tank easier:


Isn't that a great design?

Project 1: Redo the Half-bath, Part III

After the mud dried, we sanded it down, and sprayed the texture on. I bought a can of orange peel texture from Lowe's, and using the fine texture we were supposed to get a maximum of 110 feet of texture.

We first tested the texture against the old vanity in order to get a feel for spraying the walls. N had much better control of the can, probably because he's done more spray painting than I have.

The orange peel texture is nice looking, but after the one can was finished, we felt that the walls needed more texture. We grabbed one of the cans that we found in the garage, and used that one up. The combination of the two actually looked pretty good. We decided to let it dry for a half-hour, and then we'd paint.

I should note - if I haven't already done so - that this bathroom is under the stairs, and therefore has no natural lighting. We had to turn off the power to the half-bath (which is connected to the lights and power in our master bath, and was marked on the circuit box as either "dining room" or "hallway"), and uninstalled the old, ugly light fixture, and now we are using a trouble light only to illuminate our work.

We decided to begin painting around the light fixture hole and the whole vanity wall so that perhaps we could later install the new light fixture and have better lighting for the remainder of the job. At first the job seemed to going okay, and then...


BUBBLES!

(The color of the paint isn't very vivid in these pictures.)

Another consultation with my folks, another rounds of sanding and then using mud. And yet more bubbles.

I read some online, and it turns out that not only are bubbles in the drywall when painting, priming, or using mud a very common problem, I couldn't find any true consensus on the preferred solution. Some swear by adding dish soap to the mud, others declare that the way of stirring the mud is important, and still others say that the problem doesn't exist if you use good materials, use multiple light coats of mud, and pressure down hard enough to make your arm sore. I've decided to listen to this last advice, along with the layering advice of my mom, and we have had reasonably good results.

We covered the bubbles in the areas that we painted with mud, got everything nice and tight, and then use a spray primer (KILZ) on all areas where we feel that the drywall may be prone to bubbling. We sprayed another round of texture on the sanded areas, as well as nearer the ceiling, which we had previously missed, and we noticed that the bubbles no longer seemed to appear. N has since applied one more round of KILZ, then another bit of texture, and has begun to paint the bathroom. Hopefully (hopefully!) when I get back to town the walls will looking good enough that we can move forward with the next steps.

Lessons learned: when redoing the master bathroom, which is also wallpapered, we now know that after removing the wallpaper we should prime the walls using an oil-based primer. Then we can texture and paint. I bought a water-based texture, which we put on the walls without priming them, and I think this aggravated the existing problems of the drywall. The water-based texture is marketed as less smelly, which I thought was important because this room doesn't have good ventilation. Next time, I will just live with stinky air for a few hours and run the air filter throughout the house.

Sanded, mudded bubbles:


Next steps: tile the floor, replace the baseboard, and install the new vanity. Oh, and get the new light up, new hardware installed, and hang the mirror...and replace the light switches and outlet with new white ones. And maybe rehang the door.

Project 4: Second Bedroom Redecorate

Upstairs there are two bedrooms and a full bathroom. The third bedroom was damaged during the storm - pieces of wood protecting the chimney were pulled off (likely due to a satillite dish that McVicker either put up or never removed) and water was able to leak down into the bedroom. It was only water-stained, no structural damage. We primed the damaged area with KILZ and then painted the room. Afterwards, my family help us reframe the window. Unfortunately there are no pictures of the previous framing "attempt," but the woodwork was uneven, ill-fitted, and painted poorly with the same paint that disfigures most of the woodwork in the house.

The room as it is now, with the window needing a final sanding and a final coat of paint:


We painted the ceiling a true white, and the walls are painted with Olympic's Indiana Clay in eggshell, which isn't terribly glossy, but because this paint shows more brush strokes than a flat, we'll stick to flat or flat enamel finishes from now on. A little electrical work was needed to replace the ivory outlets and stubby switch with white outlets and a flater, easier to use light switch. We've replaced the original closet door handles to match the doorhandles downstairs, which we hope to carry upstairs before too long. The handles are oil-rubbed bronze.

Left to do is finish painting the window frame, repaint the doors, replace the fan, order blinds for the window, redo the inside of the closet (since the current shelves are falling down), and recarpet. I should also note that the baseboard will most likely be redone in the future as well.

I preface the description of Project 4 with this story because the second bedroom is in more need of repair and it wasn't even affected by Ike.

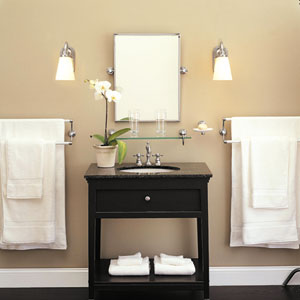
Here's a picture from the house brochure of the second bedroom:


First off, there's the door between the second bedroom and the bathroom. Looking at the original floorplan of the house, as well as the state of the walls around this door (drawn on with red), I believe that either the Wards (the first owners of the house) or McVicker decided to tear out the wallpaper that was originally torturing human eyeballs, and installed a new door as well as retexturing the walls, painting the ceiling a truer white, and then painting the walls beige. We've found texture spray cans in the garage, and the patterns match the texture in this bathroom, which is unlike any other texture in the house.


This door directly to the bathroom leaves the blue bedroom with no uninterrupted walls on which to place furniture. One wall is dominated by closet, another by two windows, and the third wall has a funny inset section. If we want a wall on which to place the bed, it almost has to be the wall that currently has two doors. Once the hole from the second door is patched there will be plenty of wall space for a full or queen-sized bed. And it opens up a room that currently feels tiny, but is in fact at least 14' by 12'.

So, there's the poorly done door install. The frame of the door was nailed into the wall with one (1!) nail. The demolition took very little time, and the door is now gone, with the hopes of repairing the wall in the immediate future.


The second big problem with this room is the color. It's a pasty blue that is one or two shades off from being attractive, but is rather sickly than calming. The paint is also high gloss, which I don't understand. The ceiling and fan were originally covered with glow-in-the-dark stars (a whole solar system of them). My mother tore down 99% of the stars during a recent visit. On Saturday N and I removed the fan, which was wobbling and threatening to endanger guests, painted the ceiling with KILZ because we do not know the origin of the grease spots on the ceiling, and then painted one coat of "Ceiling White" Olympic paint over the KILZ. The ceiling will need a second coat, and we've bought another can of paint in order to do so. During the painting process we discovered some green, pink, and red splashes of color on the walls and ceiling, and we wonder how many colors this room has been during the past 23 years. We're still looking for the perfect deep blue for the final room color.

And the final major problem, one which we encounter again and again: random screws, nails, anchors, and holes in the walls.

When we bought the house, this room had a set of three shelves on the wall in the shallow recess. The shelves were only 5 1/2" inches wide, and I assume they held something, although I doubt they held books since they weren't wide enough or sturdy enough for books. Upon unscrewing the bookshelves from the wall (because ugly is ugly, and must be thrown out) we found the following example of McVicker craftsmanship:


That is a group of four anchor holes, which were not used to support the shelves. The screws instead went into the drywall 1/8" BELOW the anchors. Ta-da!

Upon further inspection it appears there was a fourth bookshelf below the three, which was not to be found in the house. I'm not sure what prompted the removal of one and not the other three, but this is indeed not the biggest mystery of our house.

Around the room are various other holes, random screws, and nails. The closet is marred by a row of three pastel hearts:


I replaced the doorknobs on these closets with the same handles as in the orange bedroom closets. The curtain rods we still need to take down, and in the attic (oh, the attic!) we discovered two white, faux-wooden blinds cut to fit the windows. In this house one actually discovers items, objects, and belongings: they appear like presents you hide months before Christmas and then forget about until the following February. Finally, the ledges of the windows need to be repainted. Spots of grey paint decorate our window ledges. Where that grey came from, only McVicker knows.

Onward! Next part: close up the wall, repair the random holes, and paint, paint, paint!

Saturday, January 24, 2009

Project 1: Redo the Half-bath, Part II

Zounds!

Friday was spent in Lowe's picking out a new vanity, faucet, and light fixture for the half-bath. We brought along the new toilet roll bar to help us match the new faucet and lights to the rest of the bathroom's new accessories. We also selected a color: Valspar's Golden Mist. The paint associate at Lowe's was mentioning that Valspar's been on sale at Lowe's for months. While we couldn't get the new vanity in my compact car, Lowe's will be holding it for us until next Friday.

Saturday morning we woke up ready for demolition. The wallpaper was off, most of the tears in the drywall paper were patched, and now we needed to paint behind the old vanity because the new vanity is 15 inches narrower and there will be space visible between the vanity and the walls.

N disconnected the faucet, and I removed the cabinet doors and drawers. But we met a challenge - the separate pieces of the back splash were caulked so thickly we couldn't even get the crowbar into the space. Even after consulting my parents we were unable to do more than chip at the back splash and despair that an hour and half had passed...

Despondent, I decided to consult Google with "vanity removal." Behold (Warning: I have no idea what the guy is saying - I had my sound turned off. Just skip to around the 1:10 mark and watch):


Would you be surprised at how efficient this method is?


Once the sink was smashed out, we unscrewed the cabinet from the back wall, which we noticed was warped slightly, but the new vanity should hide this. Once the vanity was removed, the last task in demolition was cleaning up the trash the builders in 1986 had neglected to collect: dry wall pieces, dust, and a Whataburger wrapper:


We placed the old cabinet outside for the next three weeks until junk trash collection, and threw the pieces of the sink in the trash. We then patched the new holes and let the walls dry.

Part III will cover the difficulties of painting the half-bath.

Saturday, January 17, 2009

Project 3: Herb Spiral, Part II

So N and I went out in search of straw to fill in the herb spiral. I found several feed and supply stores near our area, but some of them said "Coastal" in the name, which I didn't know anything about. I ended up selecting one near a library that N wanted to show me.

First off, make it your mission to visit a feed supply store sometime soon. The one we went to had a cat sunning itself on the porch, and we shouted for several minutes before someone made their way over to help us. Usually their dog alerts them to the potential customer, but apparently this dog could sniff out that we were not farmers and therefore paid us no mind. But anyway, feed stores are crazy. The place reminded me of west Texas towns with populations of 100 people; not for one moment could I believe we were in a huge metropolis. There weren't any other people at the place, which consisted of a lean-to and then several storage sheds where the goods were kept.

We say we need hay/straw and how much can we get, and what price. We bought one bale for $9.50 (which goes a long way), and then walked out of the dilapidated lean-to and over to a storage shed where there's hay/straw all baled up. The girl in charge (or whatever one is at a place like this) is very reminiscent of our next-door neighbor that I unfortunately spent my time gawking at her and left N to do the loading. The similarity is a compliment to neither of them.

Then home for the scattering of the hay/straw. I should say now that I think we bought a combination of straw and hay - there's definitely both in there, and if we end up with a hay field next summer (or whenever), we'll deal with it then.

The trunk full of straw:


The bale next to the spiral:


The spiral is full!


Wetting the spiral:


Re-planting my rosemary, mint, thyme, and oregano:


I've decided to wait a couple of months and in March will buy some new herbs to add to it. We scattered the remaining hay/straw over the rest of the cardboard. And then wetted the whole down again. It's been getting very cold at night here and I know the plants haven't liked it, so perhaps the spiral will protect them better from the elements. It hasn't rained here in a little while and I wish it would.

So until March comes, I am unofficially done with this project! Hurray! It was easier to finish than I expected!

Monday, January 12, 2009

Project 3: Herb Spiral

First off, I should admit that I got this idea from a video that my dad shared with me, and it was shown to him by his co-worker.


Anyway, I decided to use the bricks dug up from the front bed to create the spiral shape, rather than rocks, mostly because I don't have the energy to acquire a bunch of rocks and bring them home when there's 200 or 300 bricks just hanging out in the front yard looking dumb.

I'll admit it now, rather than have it brought to my attention later, that I have too many projects on my plate. Oops. Rather, it's too cold for me to be able to stick with any one of these for too long, and I'm easily distracted.


This is what it looks like now. I'm still deciding on whether or not it should be taller in the center. Onto the next step, finding and buying some straw and (re)planting my herbs.

Project 2: The front walkway

So, there are not many pictures of the front of the house (that I took) that don't include piles of storm debris. But the front bed by the walk has literally one decent plant - a weeping yupon (I believe). Other plants included a brutally mutilated crape myrtle and nine or ten huge bushes that prevented any sunlight from reaching the ground around them. A little bit of ivy seems to have survived and grown over the years, although I'm neutral about ivy.

Here's the house as it was when we bought it four months ago:


Here's the house after the removal of the offending bushes:


And another shot from further away:


The yupon will stay and new plants can be added in the coming spring. Now I'm just trying to kill what remains in the bed, remove the last of the bricks outlining the bed, and mulch areas, like around the pine tree, that need it. The whole front of the house is visible from the street, though, and I should have taken a picture of the bushes before removing them. McVicker had neglected to do any lawn work after June 2008, and when we bought the house this fall we were so busy with hurricane repair, moving in, and general fall craziness (Christmas, school, etc.) that we neglected yard work; the bushes were in need of some trimming, and cutting them off entirely wasn't much more work.

Sunday, January 11, 2009

Project 1: Redo the Half-bath

So, the half bathroom was decorated with one of the most hideous wallpaper designs ever. A sort-of mauve-y pink with tiny blue and white flower designs. The ceiling was painted a cream color with a high gloss finish. As with most of the house we found a screw in the wall that had previously held a wall hanging of some sort (I believe it was flowery as well). I'm not sure what the previous owners had against traditional nails, but I'm not sure I've ever found a nail in the wall - it's always screws. The light fixture is one of those vanity lights that were so popular in eighties homes. I actually don't mind these lights when there's a source of natural light as well, as in the master bath, but for bathroom under the stairs, vanity lights are too much and too ugly. The rest of the fixtures and mirror are cheap and ugly, but not offensive. Finally, the door to the room does not open properly - one must go down the hallway beyond the door in order to open the door, and the lightswitch is placed so that it is difficult to locate.

This is the first real project that we're undertaking without the intervention of a hurricane. This is also the only downstairs room that is undeniably hideous. N suggested that we delay work on the library (which is the project I'm most interested in) in order to fix the public bathroom downstairs, and I admit that it makes sense.

First, the wall fixtures had to come down. The towel rack and mirror came down easily. The toilet paper holder, however, caused the first real problem. The screw heads had rusted through, so that at the first application of a screwdriver the head was stripped. N eventually cut off the holder using a Dremel bit, and then pulled the rest of the screw out of the wall. The toilet tank came off easily compared with the toilet paper holder.

Then I began to remove the wall paper. I began on the far wall, which unfortunately had been papered over twice, with the second layer almost directly on top of the first. Both layers are the same pink design, so as my mom suggested, it seems someone was unhappy with the first application, so they papered over it. The walls of the bathroom were not painted before application, although the majority of the wallpaper came off without the use of DIF. A few areas of the wallpaper have been more difficult to remove, and I continue to pick away at them.


N removed the door between the second bedroom and bathroom upstairs in anticipation of that project, and brought it down to see if it would work to replace the half-bathroom's current door. We have the door handle, mirror, shelf, soap shelf, towel rack and toilet paper holder already selected, thanks to my great mom. We still need to select a color (although we like yellow) and look at light fixtures and perhaps a new sink and cabinet. We considered switching to low-flow toilets for the public bathrooms, but decided against it after remembering an experience in a hotel room that we shared with friends that involved a low-flow toilet. For our master bathroom, a water-conserving toilet will be appropriate; for general public use, however, the old toilet will suffice.

Detail of the wallpaper:


More pictures of the vanity, light fixture, and where the mirror used to be screwed to the wall:


Our new accessories are from Restoration Hardware, the Eaton collection. Here's the only good picture I could find of the hardware, although it shows the faucet and lights, which we weren't able to buy from the same collection. Anyway, it's the feel of the hardware that this picture shows: